SSTV image uploads · Windows
Install and set up Slowscan FTP
A step-by-step guide to Slowscan FTP 2.2 and Slowscan Multi FTP 1.3. Set it up once, check the connection, then start sharing your received JPG images.
Download Slowscan FTP 2.2 Download Multi FTP 1.31. Install on your Windows PC
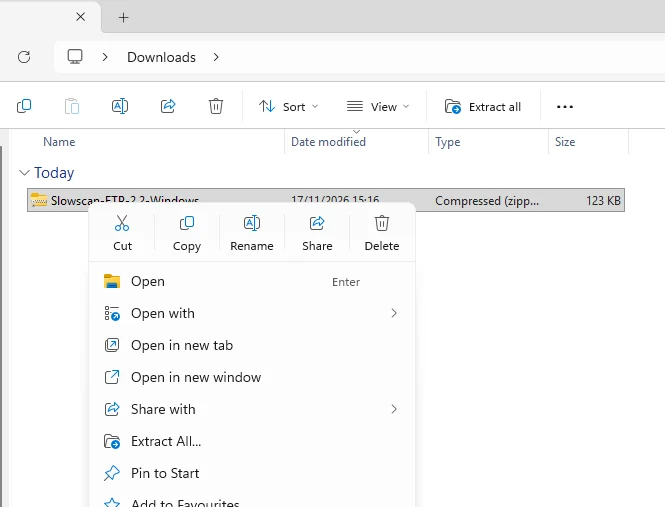
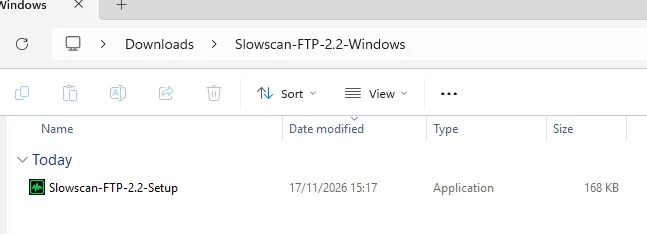
Use the Windows computer that saves your received SSTV images. Download the ZIP, right-click it and choose Extract All. Open the extracted folder.
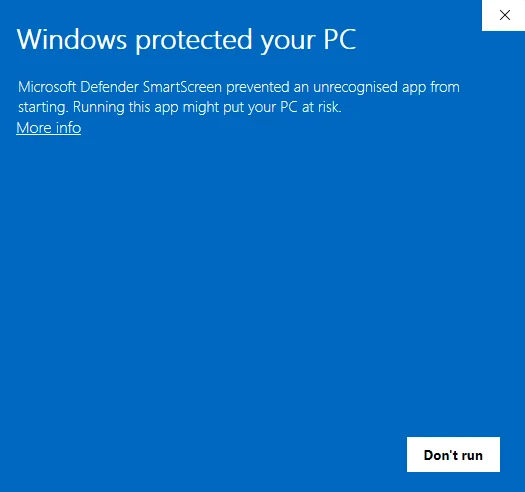
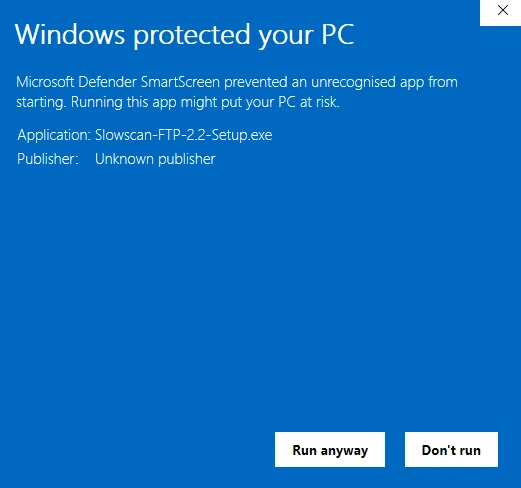
If Windows displays a warning
The installer is not digitally signed, so Windows may show Windows protected your PC. If you downloaded this installer directly from SlowscanTV and want to continue, click More info, check that the application is Slowscan-FTP-2.2-Setup.exe, then choose Run anyway. An unsigned installer is not verified by that warning; keep Windows security enabled.
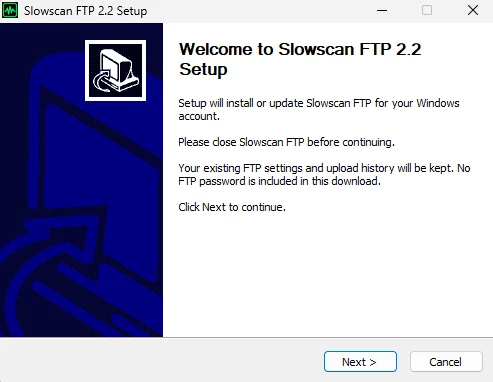
Follow the setup wizard
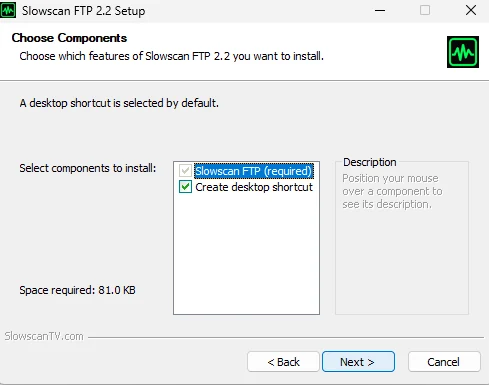
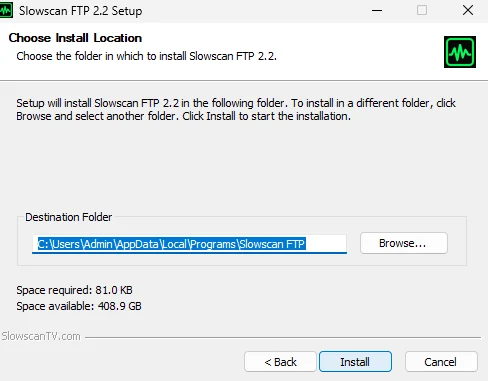
Click Next. Leave Create desktop shortcut selected if you want an icon on your desktop. Keep the suggested installation folder unless you have a reason to change it, then click Install.
On the final screen, leave Start Slowscan FTP selected and click Finish. Later, start the uploader using its desktop shortcut or the Windows Start menu.
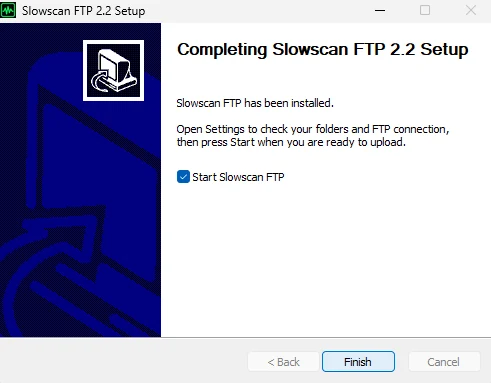
2. Enter your FTP settings
Click Settings in the uploader. The screenshot is an example from PD2F: enter the credentials supplied for your own station.
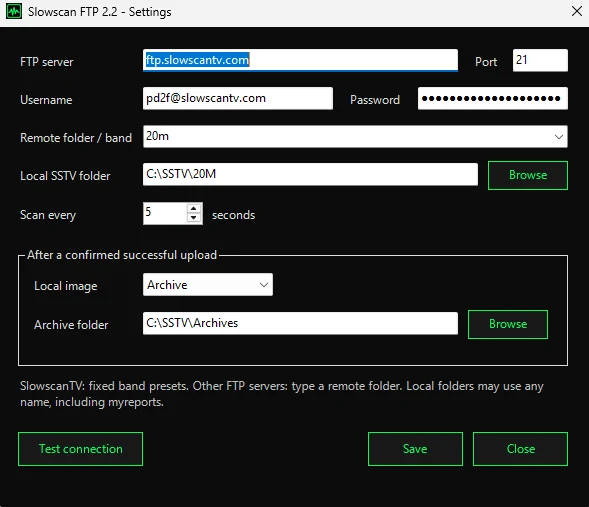
| Setting | What to enter |
|---|---|
| FTP server | For SlowscanTV: ftp.slowscantv.com, unless your account instructions specify another host. |
| Port | 21, unless your provider specifies another port. |
| Username | Your complete assigned FTP username. Do not use the example account shown in the screenshot. |
| Password | Your FTP password, supplied with your account. |
| Remote folder / band | The destination on the server, for example 20m. This is not a folder on your PC. |
| Local SSTV folder | Click Browse and select the folder where your receiving software saves JPG/JPEG images. |
| Scan every | How often the uploader checks your local folder. The example uses five seconds. |
| Local image | Keep leaves the original in the source folder; Archive moves it to your archive after a confirmed upload; Delete removes the local original after a confirmed upload. Start with Keep if you are unsure. |
| Archive folder | If you choose Archive, select a separate folder for uploaded originals. Use a folder outside the watched source folder. |
On another FTP server you can enter a custom remote folder, such as SSTV or public_html/SSTV. It must already exist. Use that provider’s server and account details.
Check your receiving software
The uploader watches JPG/JPEG files. It does not convert BMP or PNG images. Configure MMSSTV or your other receiver to save or automatically copy received images as JPEG into the folder you select here. With SatSSTV, you can select its myreports folder if you have enabled reports saved as JPG.
Test and save
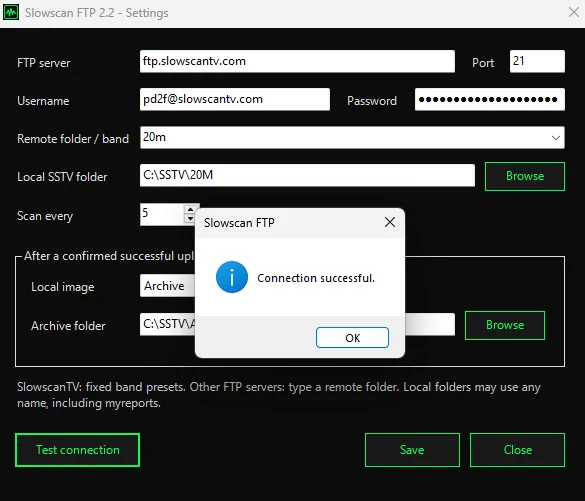
Click Test connection. If the test succeeds, click OK, then Save and Close. A successful connection test does not yet confirm that an image was uploaded.
3. Start uploading
Click Start in the main window. The button changes to Stop and the status shows Running / Watching for images.
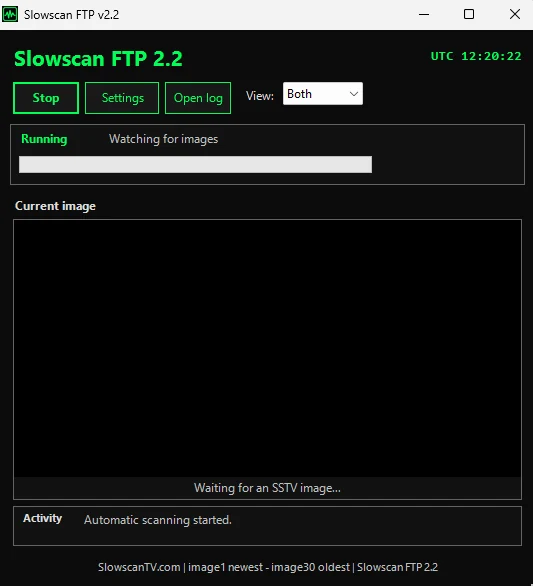
Existing JPG files that have not been recorded as uploaded can also be queued. For a first test, use a source folder containing just one test JPG, or wait for a new reception in your normal folder.
- Make sure a new JPG/JPEG appears in the selected local folder.
- Check the Activity log for a successful upload.
- After the next website refresh, check your station’s image on SlowscanTV.
The newest server image is named image1.jpg; older images rotate through the server’s 30-image set. The uploader must remain open and running to send new pictures. Click Stop to pause automatic uploading.
Use the View selector to choose Image, Data or Both, depending on how much information you want on screen.
Slowscan Multi FTP 1.3: up to three channels
Choose Multi when you want to upload JPG/JPEG images from up to three separate receiving folders using one FTP account. You do not need to install Single as well.
Install Multi FTP — screenshots
Download Multi from the button above, right-click its ZIP and choose Extract All. Open the extracted folder and run Slowscan-Multi-FTP-1.3-Setup.exe.
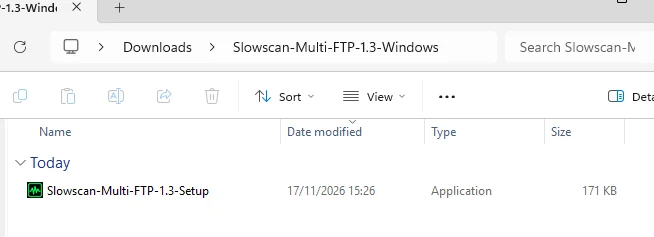
If Windows shows SmartScreen, follow the same steps as for Single above, checking that the filename is Slowscan-Multi-FTP-1.3-Setup.exe. Close any running copy of Multi, then follow Next, choose your components and install folder, and click Install. The desktop shortcut and starting the program after installation are selected by default.
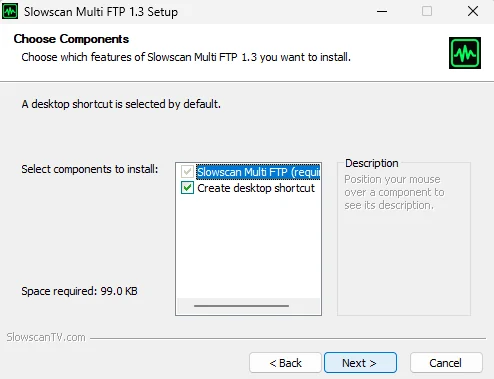
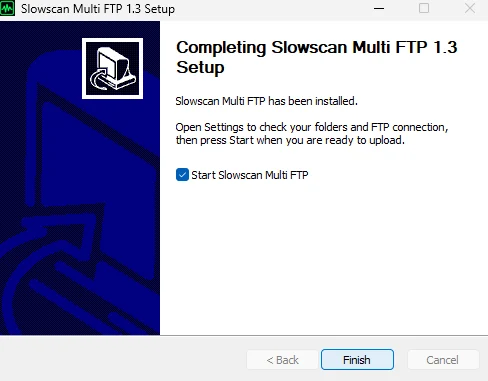
Your existing Multi settings and upload history are kept. Single and Multi have their own separate settings.
Configure the channels
Open Settings. Enter your FTP server, port, username and password once at the top. The same account is used for all enabled channels.
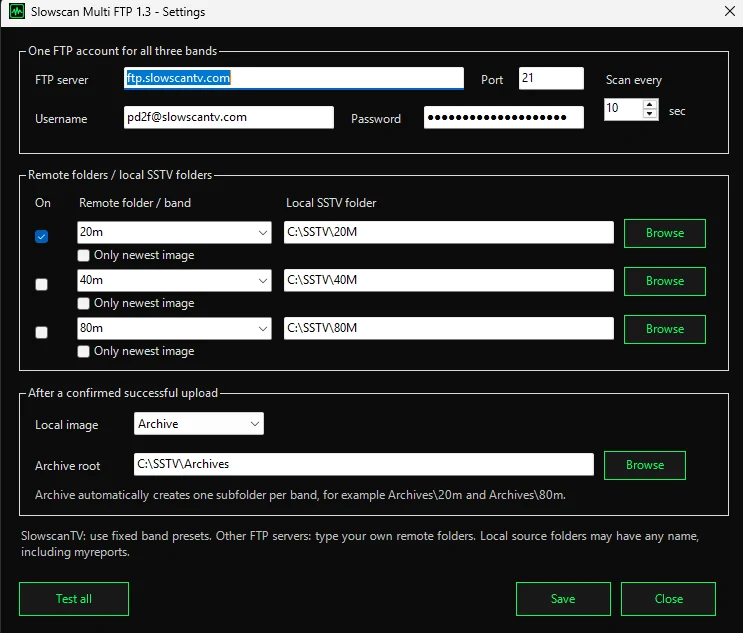
- Tick On for each channel you want to use. Leave unused channels unticked.
- Select its Remote folder / band, such as
20m,40morisson SlowscanTV. - Click Browse and choose that channel’s local JPG/JPEG receiving folder.
- Repeat for the other channels. Each active channel must have a different local source folder and a different remote destination.
For SatSSTV, a channel may watch myreports when reports are saved as JPG. For SlowscanTV, select a fixed remote band such as iss or sat; do not enter custom mode names as remote folders on our server. Custom remote folders are supported on other FTP servers.
Choose what happens after upload
Keep, Archive and Delete work after confirmed successful uploads, as described for Single. With Archive, select a separate Archive root; Multi creates a subfolder for each band automatically, for example Archives/20m and Archives/40m.
Test, save and start
Click Test all. With three channels enabled, the successful result reads Connection successful for 3 active channel(s).
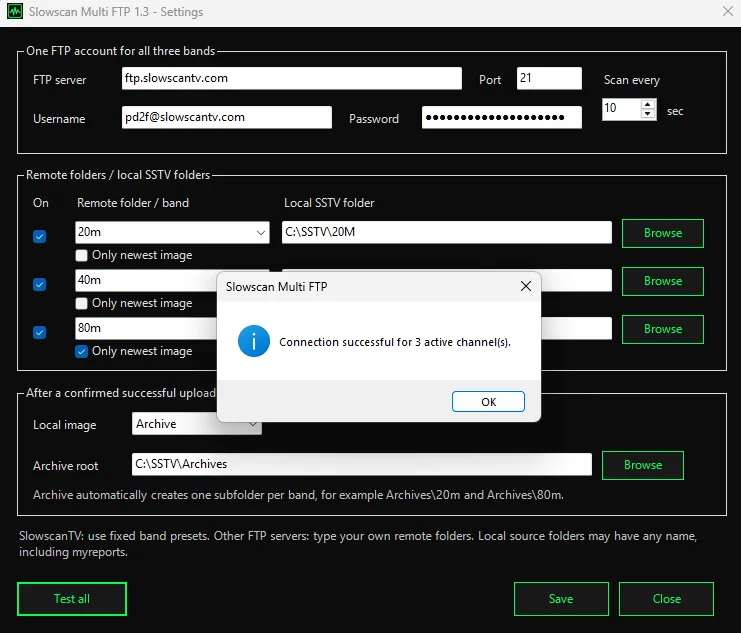
Click OK, then Save and Close. The main window shows Connection OK for each tested channel.
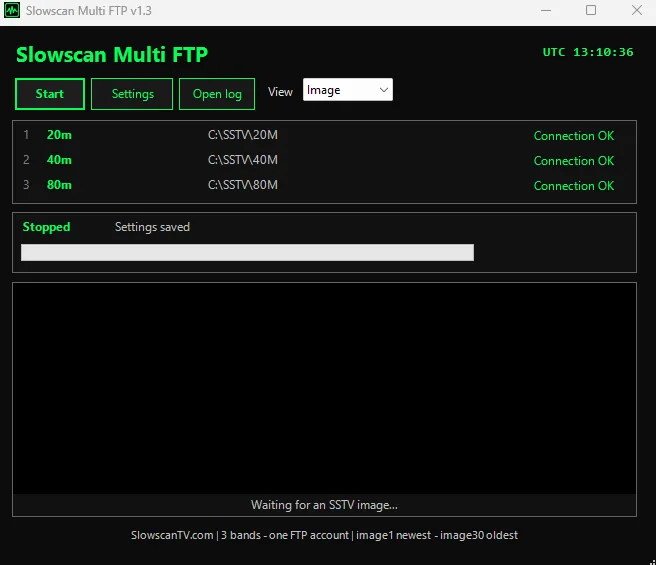
Click Start to begin watching your folders. Stopped means automatic uploading has not started. Only enabled channels will run. A successful connection test confirms the FTP connection; check the Activity log and a real test upload for every enabled channel to confirm that images reach the selected destination.
A quieter screen
The View selector offers Image, Data or Both. Choose Image to hide the data/log area and give the picture more space; choose Data for the messages; choose Both to see both parts.
If something does not work
The connection test fails
Check the host, port, complete username and password against your account instructions. Check your internet connection. If you use a VPN, temporarily disconnect it to compare. Do not repeatedly change working settings during an internet outage.
The program is running, but no image appears
Check that the watched folder contains JPG/JPEG files and that new receptions are actually being saved there. BMP and PNG files are not uploaded. If your receiver copies JPEGs to another folder, select that destination folder in Slowscan FTP.
The server accepts the login, but an upload fails
Check the remote folder, its spelling and your account’s write permissions. A successful login alone does not prove that the selected folder permits uploads. For SlowscanTV use the assigned fixed band folder.
How can I ask for help?
Click Open log and send the relevant error messages with your callsign, program version and what you were trying to do. Remove passwords or other private information before sharing logs or screenshots. Please include the actual error text: “it does not work” is not enough to identify the cause.
Contact SlowscanTV →